Setup
Installation
npm install next-s3-upload

# or

yarn add next-s3-upload
Environment variables
You'll need to setup the following environment variables for this package to work correctly.
S3_UPLOAD_KEY=AAAAAAAAAAAAAAAAAAAA
S3_UPLOAD_SECRET=AAAAAAAAAAAAAAAAAAAAAAAAAAAAAAAAAAAAAAAA
S3_UPLOAD_BUCKET=name-of-s3-bucket
S3_UPLOAD_REGION=us-east-1
Next.js automatically supports loading environment variables from .env.local in the project's root. For development it's best to put these values into .env.local.
For production, you'll need to set these variables with your hosting provider. If you're using Vercel you can configure the build step to use these variables.
In the next sections we'll go over how to generate values for these variables.
S3 bucket
Create a new S3 bucket and store the name of the bucket as S3_UPLOAD_BUCKET and its region as S3_UPLOAD_REGION in your .env.local file.
Bucket permissions
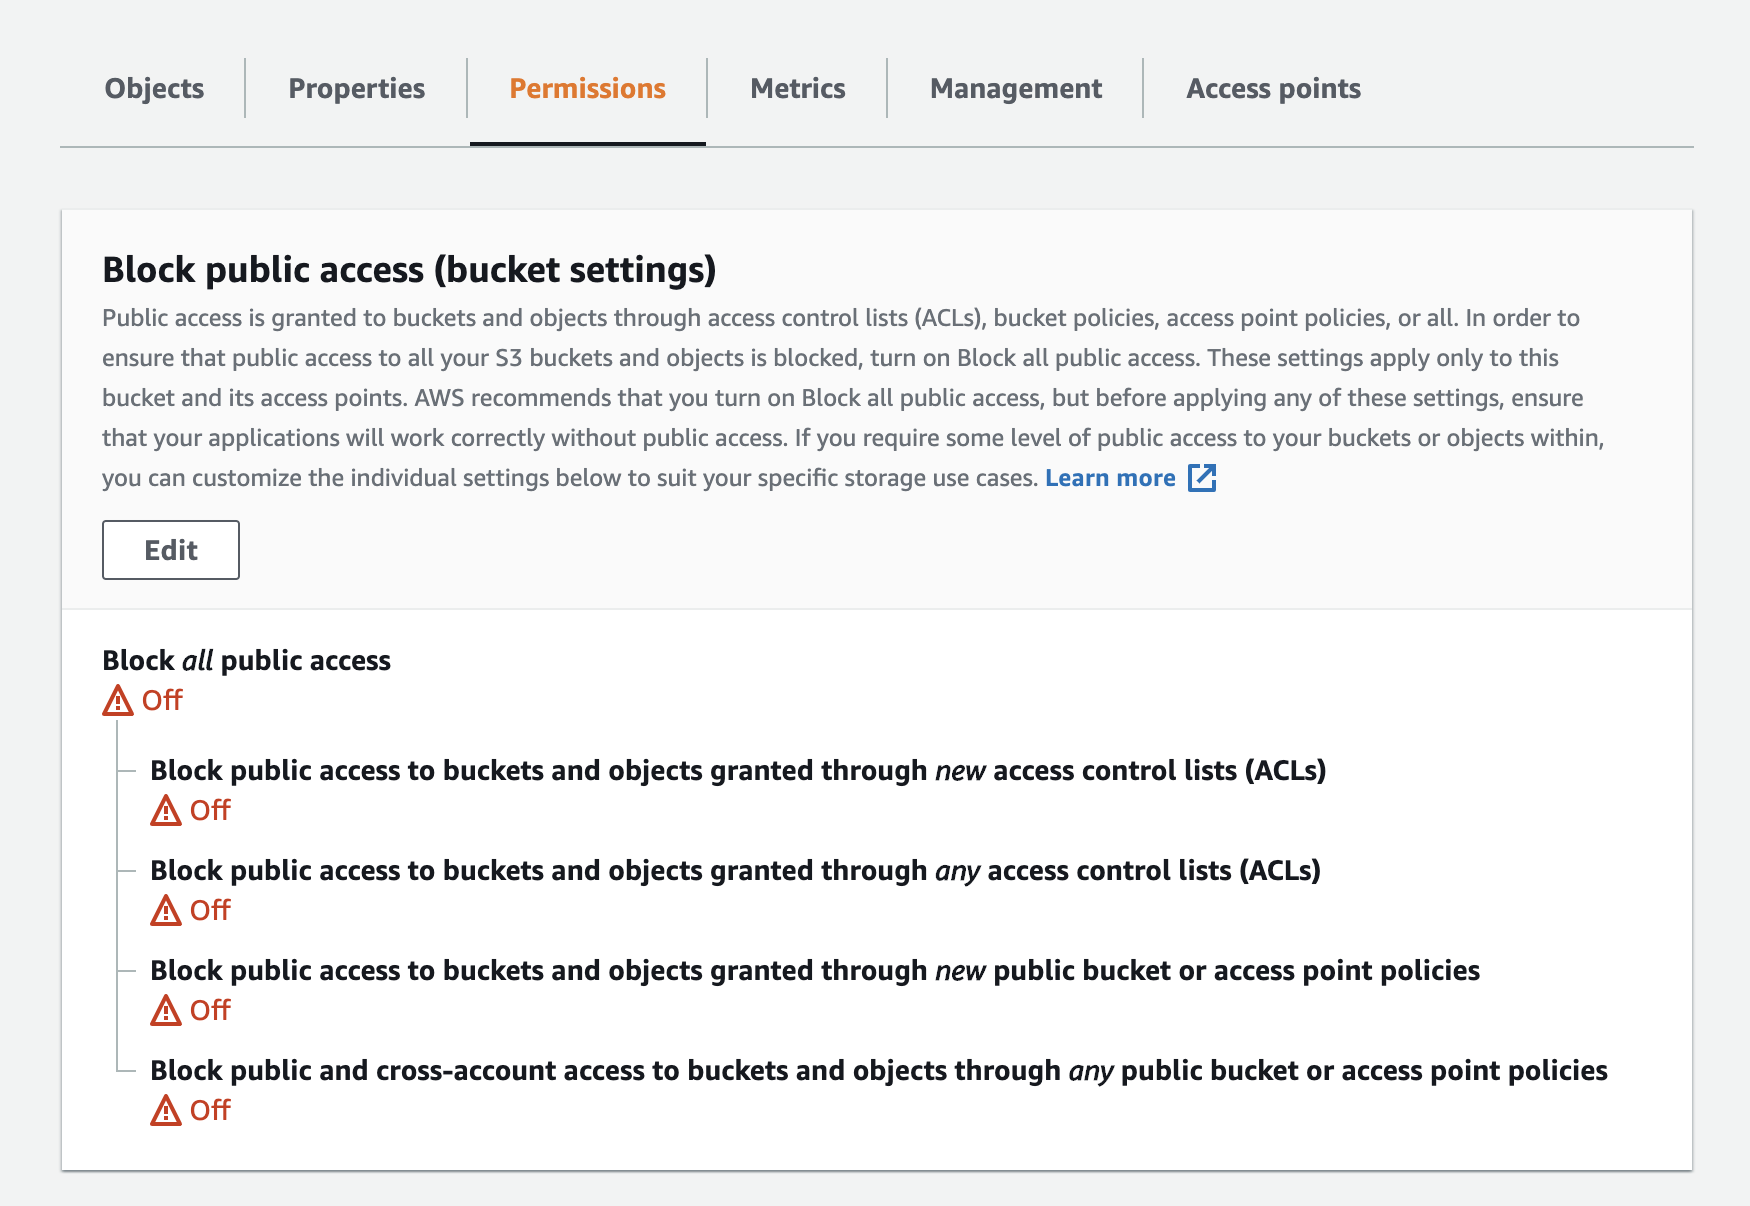
Public access
Once the bucket is created you'll need to go to the permissions tab and make sure that public access is not blocked.

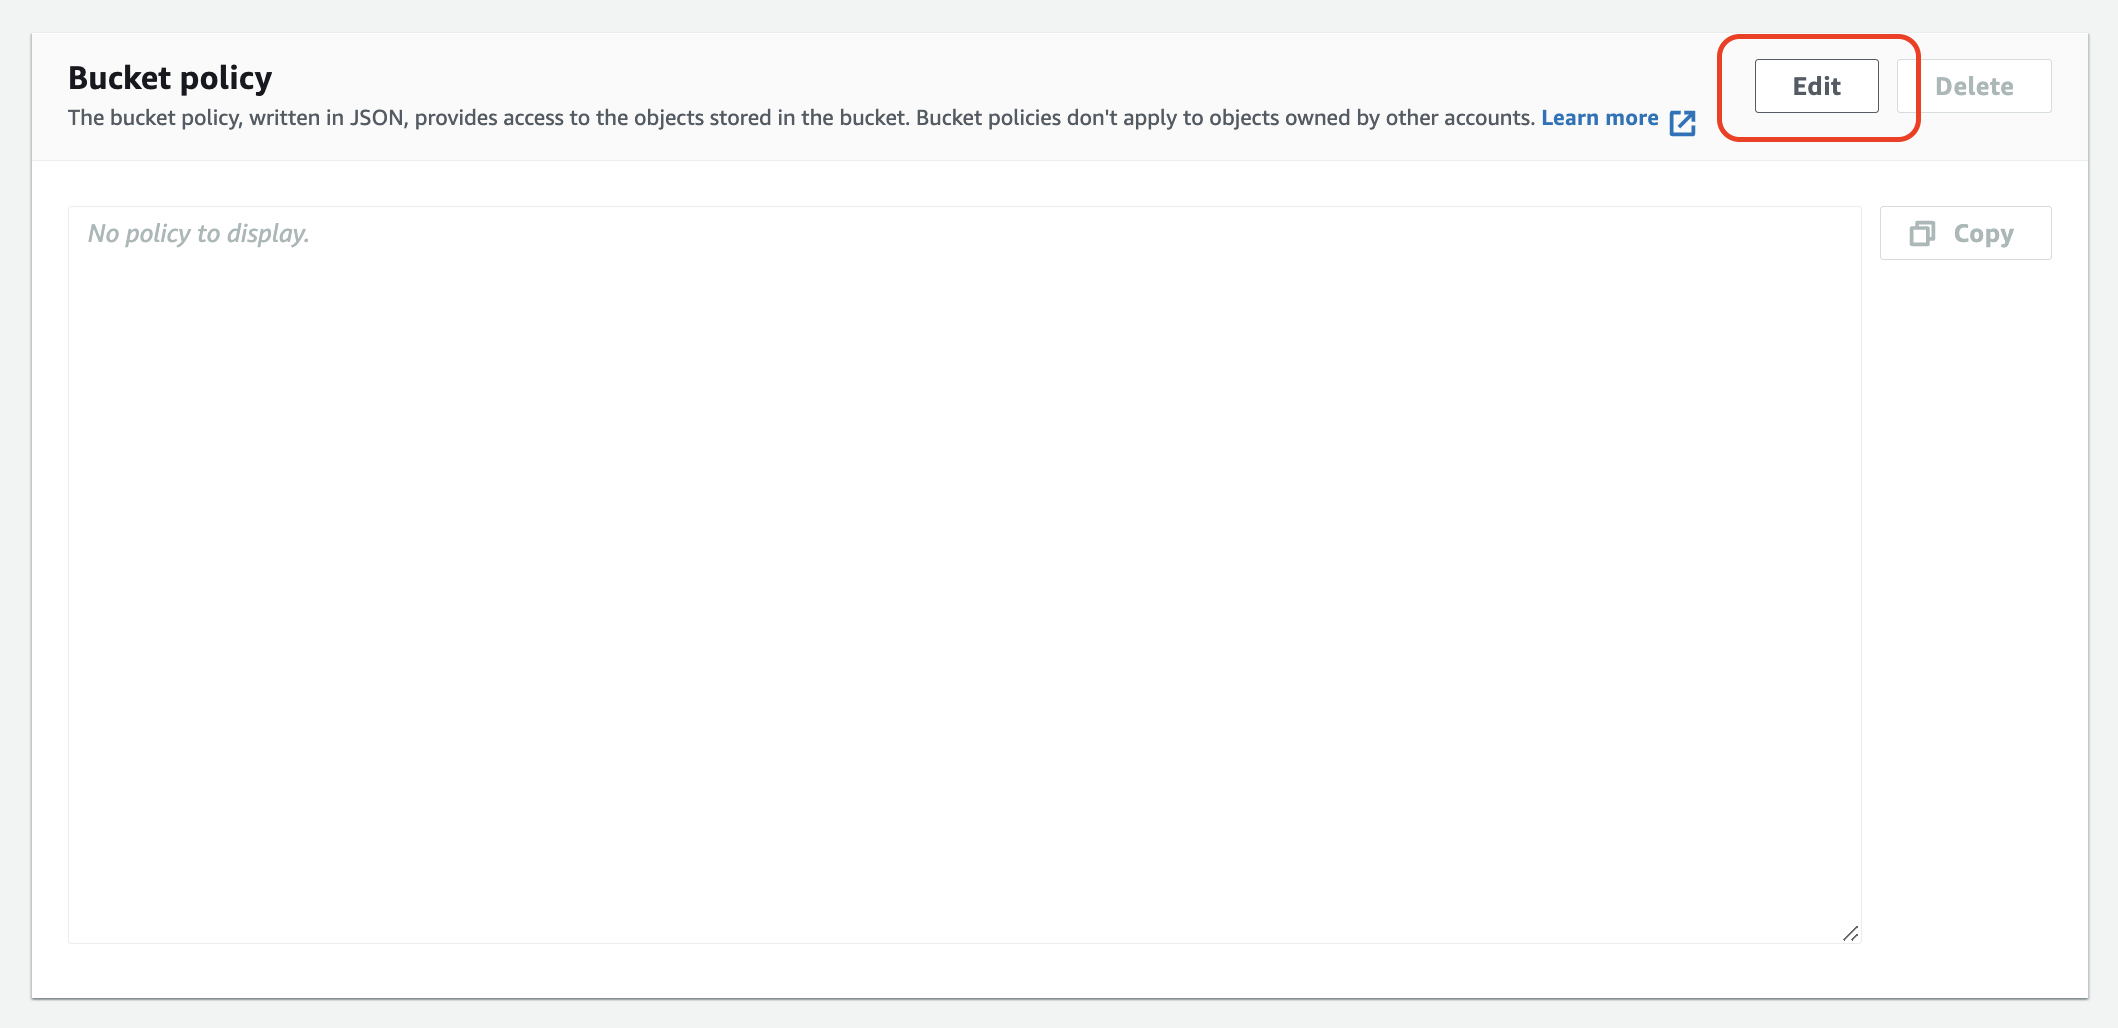
Bucket policy
Next, you'll need to add the following bucket policy. Click the Edit button in the Bucket policy section and paste in the following policy.

{
  "Version": "2012-10-17",
  "Statement": [
    {
      "Sid": "Statement1",
      "Effect": "Allow",
      "Principal": "*",
      "Action": "s3:GetObject",
      "Resource": "arn:aws:s3:::BUCKET_NAME/*"
    }
  ]
}
🚨 Important 🚨 Before saving the policy, you'll need to replace:
| BUCKET_NAME | The name of the bucket you created in the previous step. |
Save the policy to return to the bucket permissions screen.
CORS permissions
Next, you'll also need to add the following permissions in the CORS section.
[
  {
    "AllowedHeaders": ["*"],
    "AllowedMethods": ["PUT", "POST"],
    "AllowedOrigins": ["*"],
    "ExposeHeaders": ["ETag"]
  }
]
Here's what the CORS permissions will look like once you paste in the above JSON.


These settings are required so users can upload files to your bucket.
IAM user
Next, we'll need to create API keys that give your Next app access to AWS.
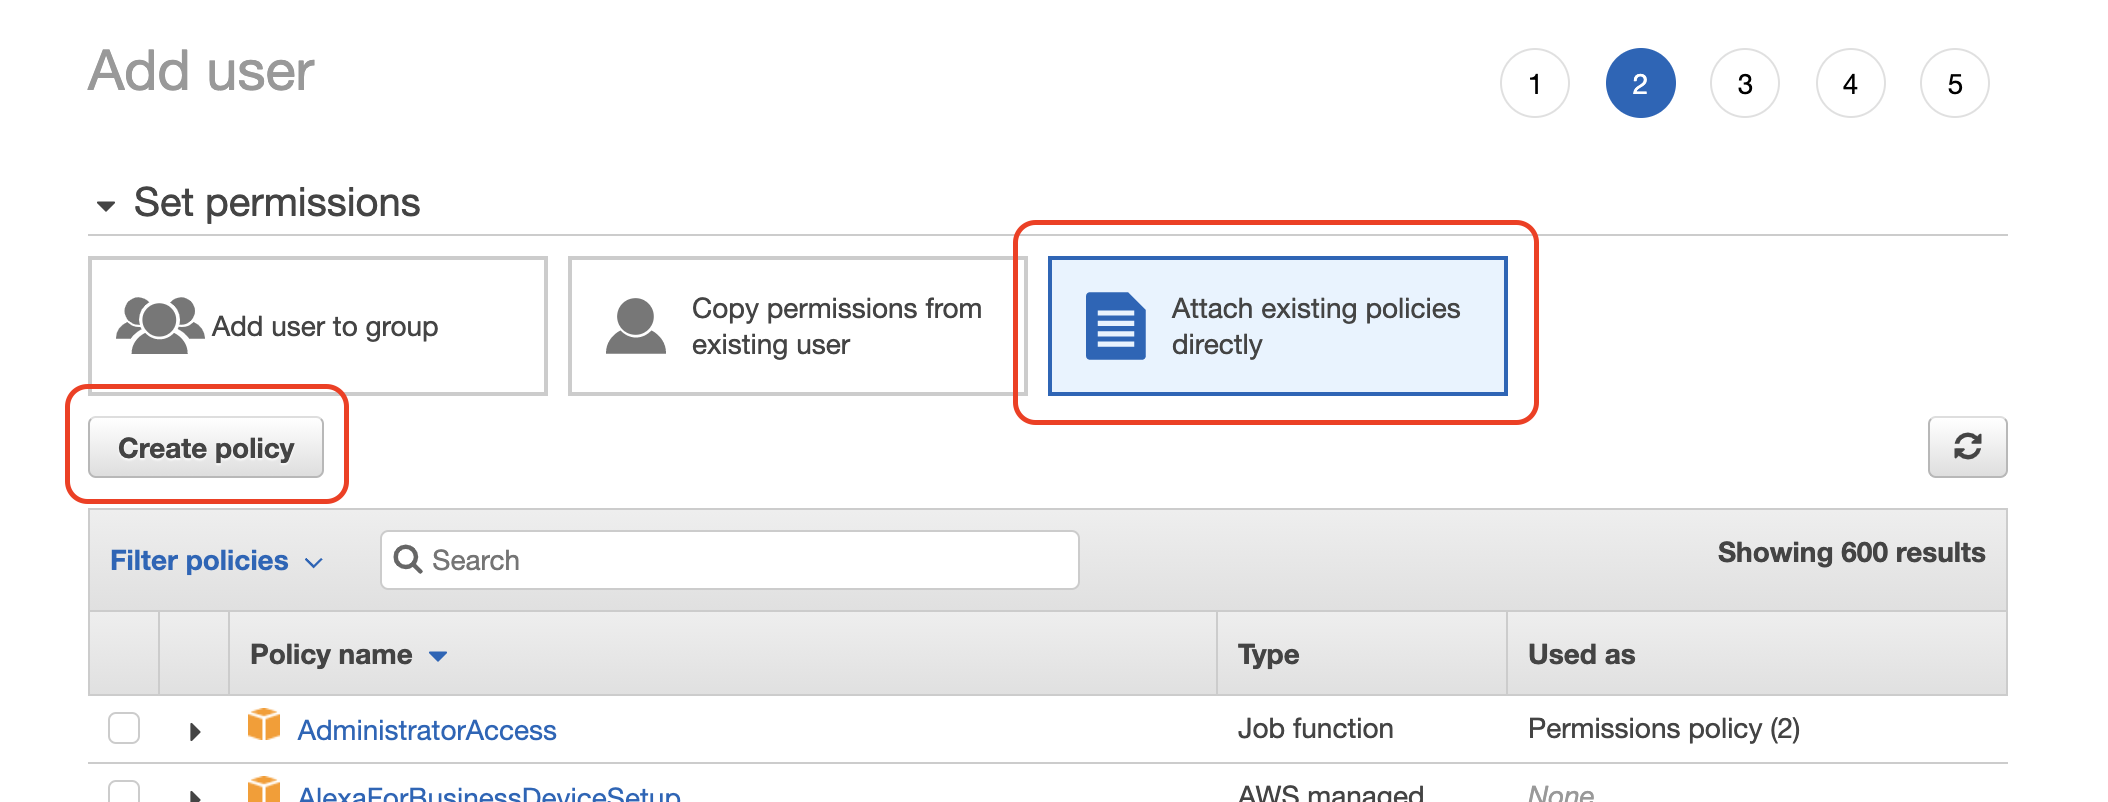
Go to the IAM section of AWS and add a new user with Programmatic access.
For the permissions step click Attach existing policies directly and then click the Create policy button.

When the policy editor opens, click on the JSON tab and paste in the following policy.
{
  "Version": "2012-10-17",
  "Statement": [
    {
      "Sid": "STSToken",
      "Effect": "Allow",
      "Action": "sts:GetFederationToken",
      "Resource": ["arn:aws:sts::ACCOUNT_ID:federated-user/S3UploadWebToken"]
    },
    {
      "Sid": "S3UploadAssets",
      "Effect": "Allow",
      "Action": "s3:*",
      "Resource": [
        "arn:aws:s3:::BUCKET_NAME",
        "arn:aws:s3:::BUCKET_NAME/*.jpg",
        "arn:aws:s3:::BUCKET_NAME/*.jpeg",
        "arn:aws:s3:::BUCKET_NAME/*.png",
        "arn:aws:s3:::BUCKET_NAME/*.gif",
        "==== ADD OTHER FILE FORMATS HERE ====",
        "arn:aws:s3:::BUCKET_NAME/*.format"
      ]
    }
  ]
}
🚨 Important 🚨 Before saving the policy, you'll need to replace:
| ACCOUNT_ID | Your AWS account ID. You can get this number by clicking on your name in the header. It's the number next to My account. |
| BUCKET_NAME | The name of the bucket you created in the previous step. |
Allowed file formats
The example above only allows jpg, jpeg, png, and gif files to be uploaded. If you're planning to use next/image with files uploaded to S3 you'll want to make sure that only images are allowed to be uploaded.
If you're not using next/image, you can edit the above example and add additional file formats. For example, you can add arn:aws:s3:::BUCKET_NAME/* to allow any file to be uploaded.
Save the policy
Next, click review policy, and name the policy next-s3-upload. The name doesn't matter, so feel free to use anything you'd like. Follow any prompts and create the policy.
Now go back to the tab where you were adding a user. Search for the policy you created and select it. If the policy doesn't show up click the refresh button.

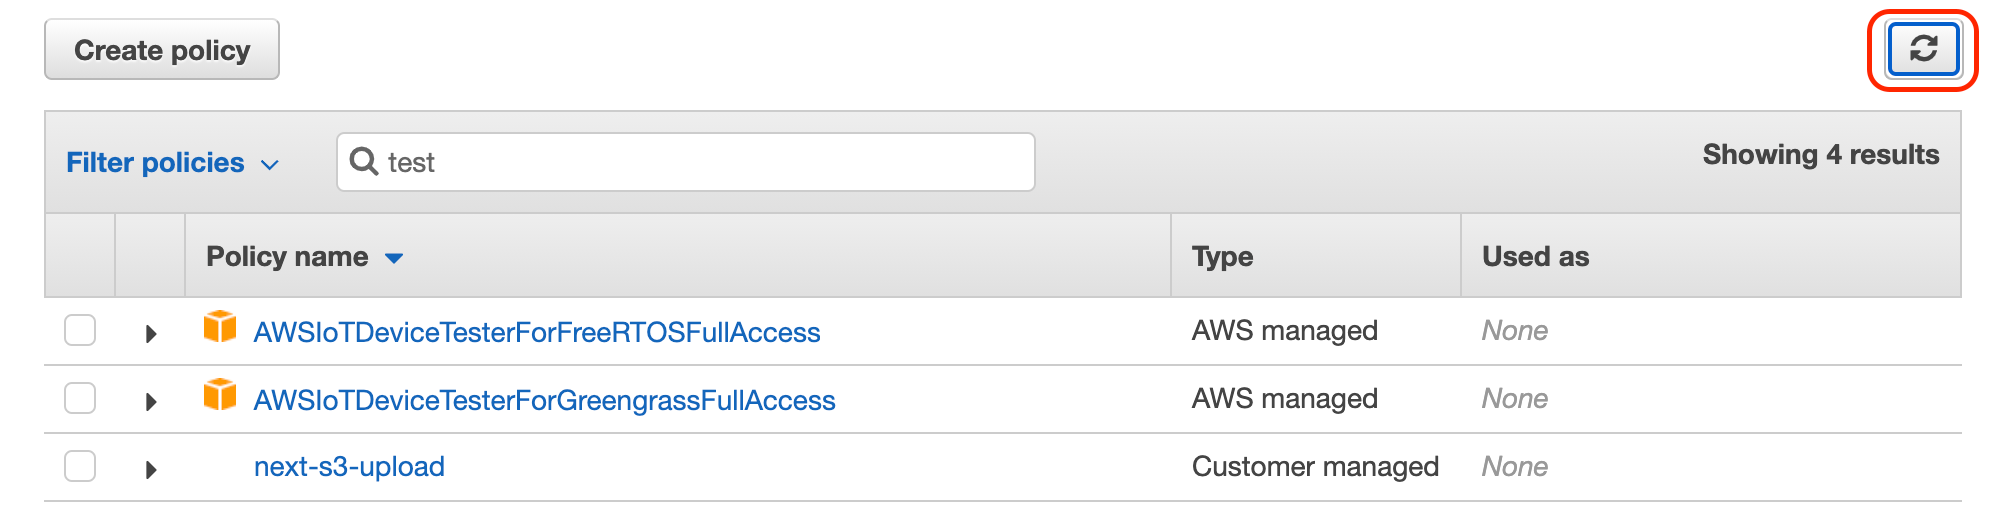
Select the policy and continue creating the user. You can just click through the next steps, there's no more configuration.
Once the user is created you'll see a screen with their API keys. Copy these keys to .env.local as S3_UPLOAD_KEY and S3_UPLOAD_SECRET.


That's it! We're done configuring AWS for uploads.
API Route (App router)
Only follow this step if you're using the App Router
In order for our Next app to securely communicate with S3 we'll need to create an API route. Paste the following into app/api/s3-upload/route.js.
// app/api/s3-upload/route.js
export { POST } from "next-s3-upload/route";
That's it. This module's POST takes care of all the communication with S3.
API Route (Pages router)
Only follow this step if you're using the pages router.
In order for our Next app to securely communicate with S3 we'll need to create an API route. Paste the following into pages/api/s3-upload.js.
// pages/api/s3-upload.js
export { APIRoute as default } from "next-s3-upload";
That's it. This module's APIRoute takes care of all the communication with S3.
Next steps
You're now ready to start uploading files to your S3 bucket!